


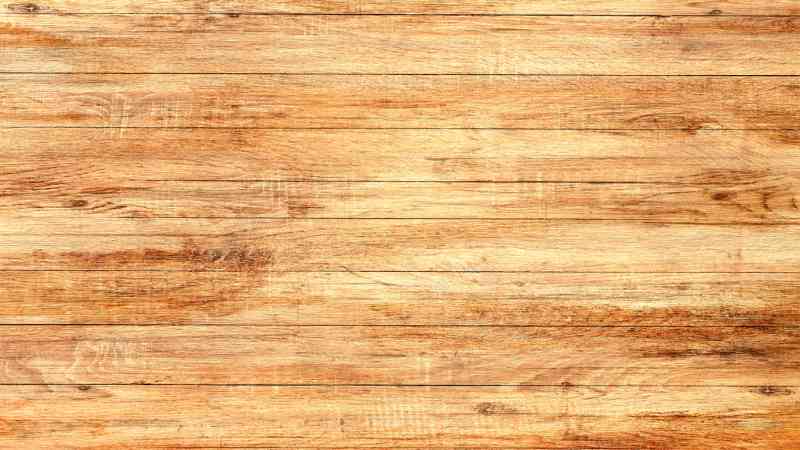
Hardwood flooring adds a feeling of elegance to any room, but it can gather dust, stains, and grime over time. This can really make a room feel old, dingy, and uninviting, so they need to be taken care of so that you can ensure that they maintain their appearance and last a long time.
This can be done by cleaning them properly whenever they get dirty, and deep cleaning is the way to maintain hardwood floors. The process of deep cleaning hardwood floors can be made easier with the right knowledge, tools, and techniques.
On this article, I am going to provide you with 10 steps to deep clean your hadwood floor using a variety of products and techniques. After that, you will find tips on how to deal with different kind of stains like spot treat stains,removing watermarks or white stains, Removing black spots, grease and pet stains,removing pet stains and gum. And finally provide answer some frequently asked question about deep cleaning floors.
The 10 steps are as follows
Step 1: Picking Up Loose Dirt, Dust
Step 2: Vacuuming the Floors
Step 3: removing furniture
Step 4: Picking the Right tools and cleaner for deep cleaning
Step 5: Wet Moping
Step 6: Damp Moping and rinsing the floor and mop
Step 7: Wiping Up excess Liquid on the floor
Step 8: Rinsing the floor
Step 9: Drying the floor floor after rinsing
Step 10: Polishing the floor
There are so many different cleaning products, techniques, and tools out there to clean hardwood floors, but which one is best to deep clean your hardwood floor or get rid of different types of stains? I will explain different cleaning methods, what works best, what the best products are, and how they work to get a beautiful and lasting result.
Deep cleaning vs. regular cleaning
When it comes to cleaning hardwood floors, there are two ways to go about it; i.e , deep cleaning and surface cleaning. The most common way to clean the floor’s surface is to sweep or vacuum it on a regular basis.
It is just intended to remove surface dirt, but it is the best way to clean floors and maintain them properly.

Deep cleaning, on the other hand, is a more thorough process that goes further, whereby extra tools and equipment are used to remove embedded dirt on the hardwood flooring, paying special attention to areas that seem particularly dirty, and that should be done less frequently
You may need to adjust your cleaning routine based on stain type and severity. The two methods are best used in conjunction with each other to get the best possible result.
To deep clean, you have to first do surface cleaning to make your work a lot more easier by removing dirt and grime on your floor. Before beginning to deep clean hardwood flooring you would start by using an appropriate dust mop or a vacuum, just as you would during a routine cleaning, to remove surface-level dust
What to Consider Before You Get Started
First, you need to determine what type of hardwood flooring you have. This will affect the cleaning products and methods you use. Hardwood floors can be either solid or engineered. Solid hardwood floors are made of one piece of wood, while engineered hardwood floors are made of multiple layers of wood. So whether it is solid or engineered, your most concerned with the floor finish because that is what can get damaged during hardwood deep cleaning.
Next, consider the condition of your floors. If they are very dirty or damaged, you may need to hire a professional to clean them. Think about your own physical capabilities. Can you get the job done?
You need to decide what type of finish is on your floor.
Know what kind of finish your floor has.
There are two types of finishes for hardwood floors: penetrating and surface (polyurethane). A penetrating finish penetrates the wood floor, providing a durable and water-resistant finish. Polyurethane coatings form a protective layer on top of the wood that keeps scratches, water, and wear from getting in.
penetrating finish
Hardwood floor surfaces are treated with penetrating finishes like tung or linseed oil, which are typically covered in a wax coat for extra gloss. Water can damage wood flooring, and these coatings readily absorb water. Use only a cleaning solution with a solvent as the active ingredient on floors with coatings that can be worn away.
Surface finish
Urethane and polyurethane surface coatings create a protective, waterproof barrier on the floor’s surface. Liquids form a pool rather than infiltrate the wood when they come into contact with surface treatments. Water and water-based cleaning products are acceptable for use on finished surfaces.
How to Find Out What Finish Your hardwood Floor Has
Rub your fingers on the floor to see if you can feel a small oily residue. If that is the case, you are sure your hardwood floor has been coated with a penetrating oil like linseed oil or tung. On the other hand, if your floor has a glossy surface, then it is probably coated with polyurethane.
To find out, use a scrapper in an inconspicuous area and scrape a little bit of the floor. If it flakes, then the floor must likely have a polyurethane coating. If you really cannot convince yourself after your testing that you can figure out your floor finish, the safest thing to do is to use a neutral, pH-balanced hardwood floor cleaner since it is safe for all hardwood & laminate floors, even if you do not know what can been used to clean them. You can aso find out be inquiring from the installer or consult a professional floor cleaning company or individual.

How to Clean Hardwood Floors – Surface cleaning
Step 1: Picking Up Loose Dirt, Dust
The first step in any extensive cleaning of your hardwood floor is always to sweep up any loose dust and dirt. It matters for the following two reasons:
Tools you will need:
- A dust pan
- Broom with synthetic fiber
- Mop with micofiber pads
- Vacuum with floor brush attachment
Preventive measures and regular cleaning like dusting and picking up loose dirt are the best ways to keep hardwood floors clean. If hardwood floors are dirty and/or have tracked in dirt and dust from outside, start by cleaning up any loose dirt and dust with a broom or mop. This should be done on a weekly basis.
A mop with a big, flat head and a microfiber cloth pad, like the Swiffer Sweeper, is typically the best option for cleaning wood floors. With pads made of small synthetic fibers, these mops can remove dust in the grooves of wood floors without damaging it. You can also use large microfiber cloth heads on dry mops; they contain tiny fibers that reach into floorboard grooves and take up dust without hurting or harming the floor.
Choose pads that can be removed, machine washed, and reused to reduce costs and your effect to the environment. such as the KEEPOW Reusable Pads. Swiffer Compatibility Washable and reusable sweeper mops Refills for sweeper mopping Wet and dry sweeping materials
Choose a broom with synthetic fiber ends if you’d rather sweep than mop. This will help trap accumulated dust in the broom head and avoid it from going back on the floor.
You should wipe down wood surfaces like floorboards, baseboards, etc. Be sure to get into all the deep nooks and crannies.
Step 2: Vacuuming Floors

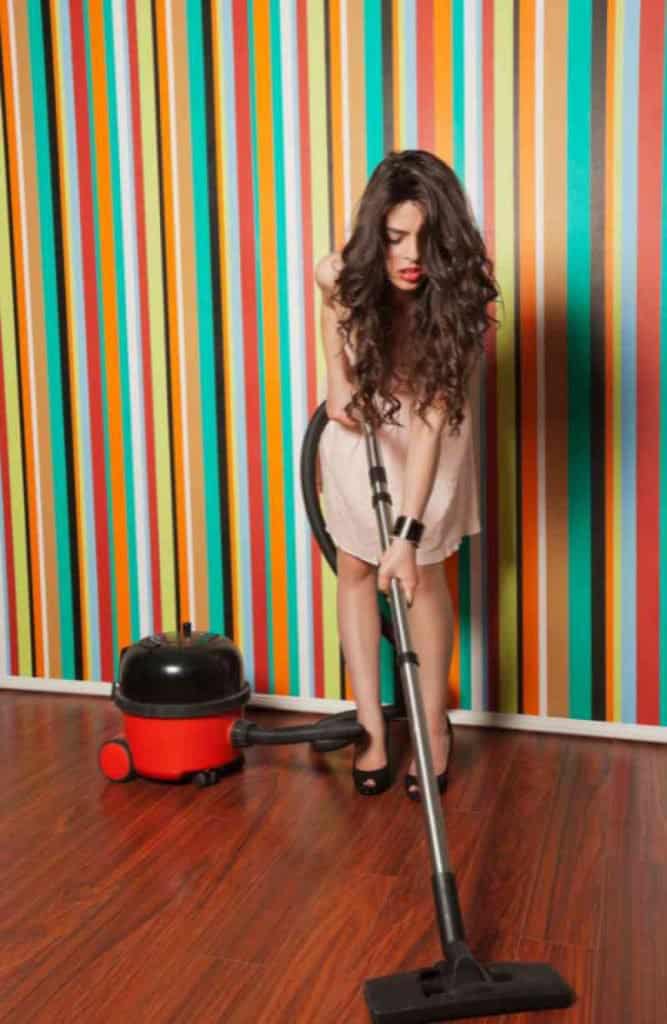
There are a few things to keep in mind when using a vacuum to prevent floor scratches.
Use caution when operating a vacuum that has a beater bar with bristles. The vacuum head’s beater bar is a cylinder-shaped bar that rotates quickly to lift debris that is deeply lodged in high-pile carpets. Your flooring may be scratched by a vacuum’s beater bar.
Use a floor brush attachment, a vacuum made specifically for hardwood floors like the Miele Compact C1 Pure Suction, or a vacuum that has a mode made just for hardwood floors like the Titan T4000.2 Heavy Duty Bagged Upright Vacuum Cleaner.
It’s a great idea to vacuum once or twice a week as opposed to sweeping or dry mopping. To make sure the wheels and brushes of your vacuum do not scratch your floors, test it in a discreet location and in a small area. Most of the time, a vacuum is not dangerous, but make sure the rotating brush feature is off. Some vacuums also come with a flat floor attachment with a soft pad that can be taken off.
Your vacuum should be moved from one side of the floor to the other, giving special attention to the intersections of neighboring floor boards if any. Trapped dust is hidden in these crevices. Send the vacuum under the furniture to remove hidden dirt.
How to Deep Clean Hardwood Floors so They Sparkle
When it comes to cleaning hardwood floors, most of the cleaning is focused on the surface. However, over time, dirt and grime can build up in the cracks and crevices of the floor, making it necessary to give your floors a deep clean, as heavily soiled floors will require more vigorous cleaning than lightly soiled floors. Here are a few tips on how to deep clean your hardwood floors with some additional steps:
Step 3: remove furniture
The first step is to remove all of the furniture from the room or slide them to one corner of the room so that you can have full or partial access to the floor. By removing all the clutter from your room, you’re making it easier to work on the floor itself.
However, be careful not to damage the flooring when moving furniture. If there are heavy items, try to use two people to move them instead of one. The best way to slide furniture during floor cleaning is to use furniture sliders that make it easier to move heavy furniture easily and without damaging your floors. You can get those sliders from Home Depot or Lowe’s.
Step 4: Pick the Right tools and cleaner for deep cleaning
Tools you would need
- Sponge
- Bucketless wet mop (preferably)
- Mop bucket
- Water
- Microfiber pads
- Floor mop with detachable microfiber head
- Floor cleaning product
- Fan or air conditioning
To clean hardwood floors, you will likely need a sponge mop and cleaning products. Start by mopping the floor with a damp mop in a circular motion. Work up the polish with water until the wood is clean, then use cleaner to deep clean any areas that may be dirtier than others. Make sure to run fans or turn on air conditioning as soon as possible after cleaning to avoid causing moisture damage in your home.
Choosing your floor cleaner
There are many types of floor cleaning products on the market today. However, one thing to keep in mind is the type of cleaner you should use for hardwood floors. Because wood is a natural product and can be sensitive to chemicals, it’s important to select a floor cleaning product that won’t damage your floors. Here are some tips on choosing the best cleaner for hardwood floors:
-Consider using an enzyme-based cleaner. This type of cleaner breaks down dirt and grime so that it can be deep cleaned effectively,, and it is good for pet urine.
-Choose a water-based floor cleaning product if you have laminate.
Bona products are highly recommended for hardwood floor cleaning . It is one of the best brands on the market for cleaning your hardwood floors.
Using the Bona microfiber mop: For the best results, sprinkle your floors lightly with water from a spray bottle before washing them down right away with wet microfiber mop cloths. Or follow the instruction that came with the product.
Cleaning pads


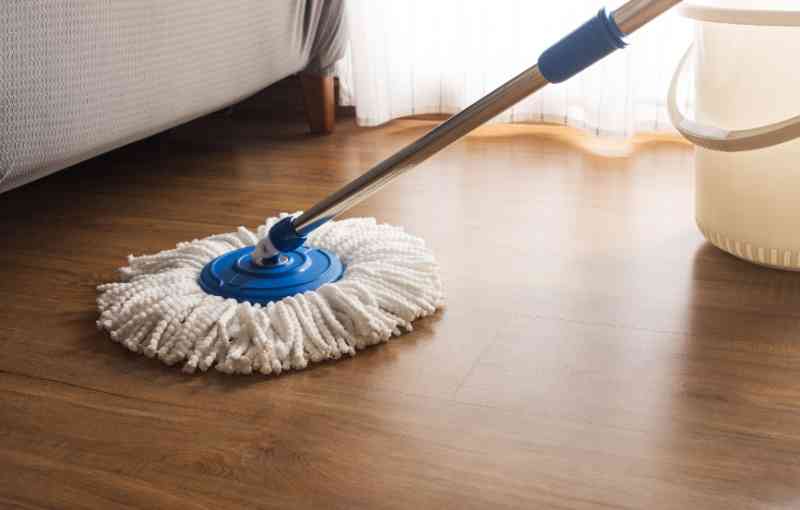
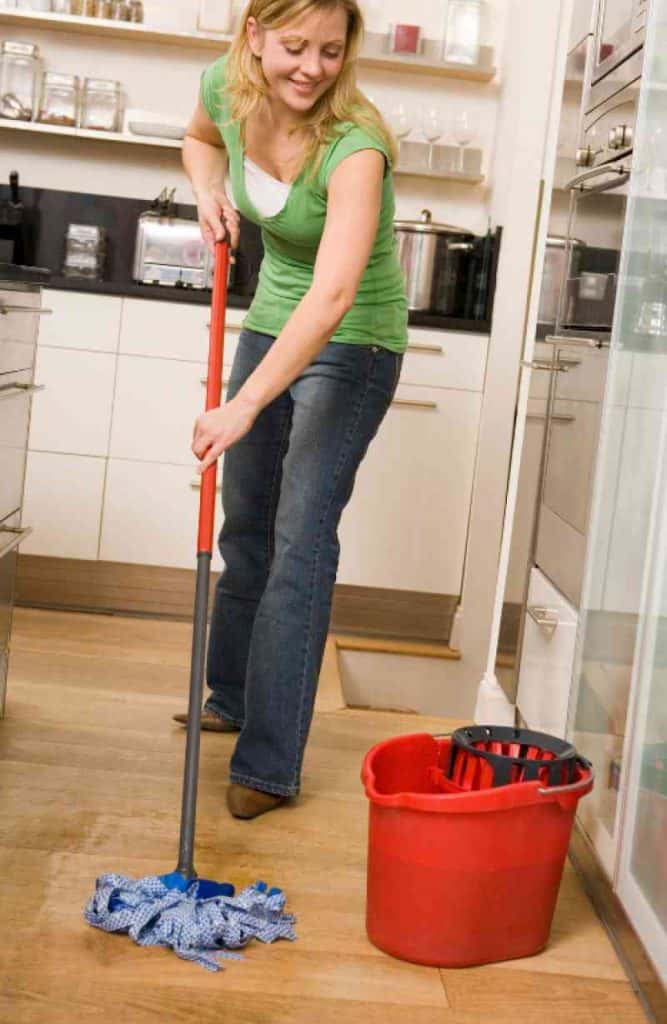
Step 5: Wet Moping
Mixing your cleaner and moping
Three things are required: a mop, a pail of warm water, and a light cleaning agent. Add the cleaning agent to the bucket of warm water and stir. Pour a small amount of cleaner onto the mop and mix, following the instructions on the label, and start mopping. To make the mop damp rather than wet, dip it into the bucket and wring it out.
The best wet mop to use is a microfiber mop. This type of mop is designed to be used on hardwood floors, and it will deep clean the floor while leaving a streak-free finish. When cleaning with a microfiber mop, be sure to soak the mop , and then squeeze it almost dry until it feels really damp. Then, use gentle strokes to clean the wood surface.
Alternately, you can get a thorough cleaning with a ph-neutral, wax-free, and petroleum-free cleaner like Bona Power Plus Hardwood Floor Deep Cleaner or a homemade solution made from 14 cups of dish soap and 1 gallon of warm water.
Step 6: Damp Mop and rinse the floor and mop
Use the mop head to rub through the hardwood floor with a circular motion for deep cleaning of grime, dust, and dirt buildup. Rinse the floor about two times with clean water. This will remove all the residue from the floor.
Step 7: Wipe Up Excess Liquid on the floor
wipe up excess liquid on the floor with a microfiber mop. This will help avoid water spots and wood damage from moisture.
Step 8: Rinse the floor
It is important to rinse the hardwood floor after mopping in order to remove any residual cleaner or soap that may be left on the surface. This will help to avoid any potential streaks or spots that may be caused by the cleaner. Additionally, rinsing the floor will also help to remove any dirt or debris that may have been missed during the mopping process.
Step 9: Dry the floor Floor after rinsing
Using the fan or AC to dry the floor
After rinsing the hardwood floor, it is important to dry it in order to prevent water damage. Water can cause the wood to warp and swell, and it can also lead to the growth of mold and mildew. Drying the floor after cleaning will help to keep it in good condition and extend its lifespan.
Use a ceiling fan or the air conditioner to hasten drying if the weather is humid.
Or while the hardwood floor is still damp, you can turn on the fan or air conditioner and allow it to blow onto the floor. This will help to speed up the process of drying the floor. There will be no possibility of water damage and your floors are ready to be walked on right away.
Dry the wet Mop and return It to its Storage Bag
To dry your wet mop, simply wring it out thoroughly and hang it in an area that is well ventilated and warm, or hang the mop with the strands down, allowing the water to drip into a container below.
Dry your microfiber mop before storing it in its storage bag.
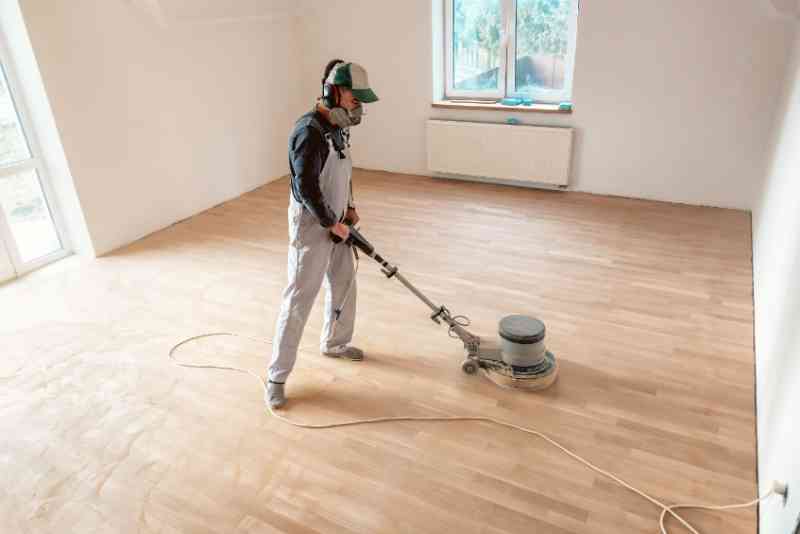
Step 10: Polish the floor

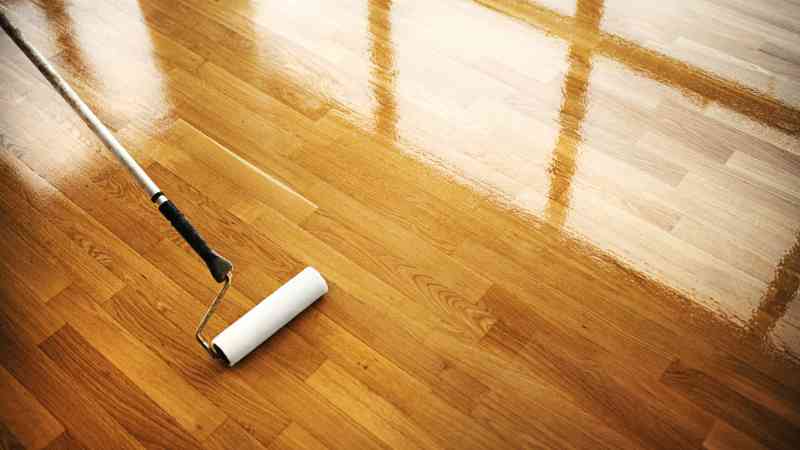
Since a deep clean should be sufficient to leave your floors looking fine, you may want to skip this step. Reach for the polish if you want to go the additional mile and truly make your hardwoods shine. To be sure a floor polish is safe to use on the specific finish of your hardwood, just be sure to carefully read the manufacturer’s instructions.
Your hardwood floor will effectively be protected from any filth or debris that might come into contact with it if you use a wood polish on it. The polish will aid in restoring the floor’s gloss and luster and make it appear like brand-new once more.
The best strategy for polishing hardwood floors is to use a light touch. There’s no need to rub the polish into your floors vigorously. When applying, let the polish handle all the work.
Using a soft cloth, apply a solvent-based hardwood floor wax like
Trewax Paste Wax. Use the recommended dosage that the manufacturer suggests. Next, polish the wax in back and forth motions, working in 2-foot chunks at a time, using a roller with the soft cloth,, Pour a tiny amount of wood floor polish onto the floor in the shape of a S. Start in the back of the room and work your way toward the door. Or you can use an electric polisher or buffer, which can be bought or rented from most hardware shops. To get your floor finish professionally would cost you about $.50/sq ft
Only polish floors every two to four months, or more frequently depending on the volume of traffic in your house.
Refinishing
I have put this last although it is surposed to come before polishing because it is not frequently done and you can deep clean your home withoutthis step. This usually is done on new hardwood floor installationsorfloors that have some major probles or stains like this one.

The purpose of refinishing a hardwood floor is to restore its beauty, increase its durability, and protect it from wear and tear. Refinishing a hardwood floor is also an opportunity to change the color or style of the floor, which can give a room a whole new look.

Above are the 10 steps to deep cleaning your floors and getting them sparking. These steps would normally be sufficient to get the job done. But sometimes, you have to get rid of different kinds of stains. I am going to show you how to do so.
Removing Stains
Floor Cleaner to Remove Stains on Hardwood Floors
There are a variety of floor cleaners that are designed to remove stains on hardwood floors, but to remove them, you must know what their appearance looks like in order to decide how to remove the wood floor stains effectively. An easy-to-remove sort of surface-level water stain is indicated by white stains, for instance.
Stains that are dark brown or black may be more difficult to remove since they are deeper. The stain’s color reveals whether it is present in the floor’s waxy top layer or has gotten beyond the finish and into the wood’s grain.
How to spot treat stains on hardwood floors
If your floors still have some spots and stains after the deep cleaning process is finished. Depending on the finish, the ACI (American Cleaning Institute) advises using one of two spot cleaning techniques that are both secure for hardwood i.e. wax and steel wool and Baking soda
Wax and steel wool method: Softer floors are more susceptible to developing stains and marks that have reached the wood itself. The most effective treatment in this situation is to gently rub the trouble spot with fine steel wool dipped in floor wax. This multipurpose spot cleaning technique is effective for removing everything from dark stains to heel marks, but you shouldn’t use it unless you are familiar with the type of finish on your floor, because steel wool will harm urethane-finished flooring.
The baking soda method: The most common and stain-resistant floor coatings, urethane, can be safely cleaned with this spot cleaning technique. However, if your deep cleaning didn’t require a lot of labor, some traces of earlier spills may still be visible on the finish’s surface.
The ACI advises making a mixture of baking soda and water to remove these stains. Apply the paste to the stain and use a soft microfiber cloth to gently work it into the trouble spot. To make the paste, add just enough water to give it a thick, slightly grainy consistency. After letting the paste sit for 10 to 15 minutes to let the baking soda do its job, wipe it away with a moist cloth.
Step 4: Remove Watermarks or White Stains
White stains are notoriously hard to get out of wood floors without a lot of trial and error. This happens because every water stain is unique; and these surface-layer stains only impact the hardwood finish. Removal efforts may be less successful due to the degree of penetration and the type of finish used.
How to get white stains off of wood floors:
Mineral oil
Apply a thin layer of mineral oil using a gentle microfiber cloth. Wait a while, then repeat the process. Within 24 hours, this procedure ought to eliminate small water stains.
MineralSpirits
Mineral spirits saturate the wood floor finish more deeply. If mineral oil is ineffective, use mineral spirits to carry out the same procedure. Once more, let it a full 24 hours to dry.
Baking Soda and Water
Mix water and baking soda to make a paste. Utilizing a microfiber cloth, apply the paste to the stain and let sit for 24 hours. After polishing the furniture, let it dry overnight.
Removing black spots, grease and pet stains.
When dealing with pet stains and black spots, use floor wax and gently rub the area with softer steel wool. Use a moist cloth to wipe the floor wax clean.
Use the same method with very fine steel wool to remove any heel stains.
Use dishwasher detergent if the stain is grease-related. This will aid in the grease’s breakdown. After cleaning the area with the detergent and a soft cloth, gently rinse it with fresh water.
Dish soap to remove oil stains
Try to drop some food on the floor and see if a dark green stain appears that your standard cleaner is unable to remove. You should apply a few drops of regular dish soap to the area, then remove it by using warm water and a fresh cloth. Similar to how it cleans food off plates, the soap will break up the fat. Just be sure to let the area completely dry and prevent standing water.
Dark stains could indicate that something has damaged the finish on your floors. If dish soap doesn’t work, break up the stain by buffing the area with grade #000 steel wool, the finest available, and a little mineral spirits or floor wax
Removing gum.
To make the gum rock-solid, place some ice cubes in a plastic bag and press it on the gum. Once the gum has cooled or become sufficiently firm, you can easily chip it off with a plastic knife or any other flat object.
Conclusion
Floor cleaning is an important task, and hardwood floors are no exception. When deep cleaning your floors, be sure to use different products and techniques based on the stain. Remember to clean all of the hardwood flooring in your home regularly so that buildup doesn’t cause problems down the road!
Questions:
How do you take preventive measures to minimize hardwood cleaning frequency?
There are a few things you can do to keep your hardwood floors from getting dirty frequently and minimize cleaning frequency.
By taking some preventive measures, you can make your life a lot easier and keep your floors constantly looking great by limiting their exposure to things that can deteriorate their quality, like dust, dirt, and stains.
Make sure to sweep or vacuum regularly to remove any dirt or debris that may be on the floor.
Place outdoor mats at entryways to help capture any dirt or debris that might be brought in from outside.
Try to keep shoes off the floor as much as possible to avoid tracking in dirt and debris.
Use indoor runners at entrances and sizable area rugs in high-traffic areas to shield your hardwood
Can I use vinegar on hardwood floors?
Cleaning highly filthy hardwood floors can be accomplished with the aid of a white vinegar-based hardwood floor cleaner. In addition to offering a safer cleaning method for your hardwood floors, learning how to clean hardwood floors with vinegar will save you money. White vinegar needs to be diluted because it can be excessively strong and harmful when not properly used . Use 1/2 cup of white vinegar for every gallon of water.
Caution: Test your cleaning solution in an inconspicuous area before adding vinegar because it can fade some hardwood flooring finishes.
.
Here are some tips for minimizing your cleaning frequency while still making them look their best:
Constant Vacuuming: Sweep or vacuum the floor on a regular basis to remove any dirt or debris that may be on the floor.
Using outdoor mats: Place outdoor mats at entryways to help capture any dirt or debris that might be brought in from outside.
Using indoor runners and area rugs:Where you sit for dinner, watching TV in the living room, and where the kids play, you can put a small carpet
Use furniture pads: Furniture pads can be placed under the legs of all furniture to protect the floor from marks and scratches.
Taking off your shoes: When you take your shoes off before entering your home, you are helping to minimize the frequency of hardwood floor cleaning. By doing this, you are preventing dirt, mud, and other debris from being tracked into the house on your shoes.
This will help to keep the floors clean for longer and will require less frequent cleaning.
The hardness of the material on the sole of Shoes can cause marks, wear and tear over time ans will eventually diminish the floor finish.
How often should hardwood floors be cleaned?
Hardwood floors should be cleaned once a month or vacuumed weekly, depending on traffic and usage. Low traffic areas may just need to be cleaned on a monthly or quarterly basis.
Daily
Dusting: Dusting is recommended daily for Hardwood Floors.
Although the National Wood Flooring Association (NWFA) advises dusting hardwood floors every day, many people don’t have the time to do so.
If you are unable to stick to that timetable, choose every few days or limit your attention to high-traffic areas like hallways and kitchens. Or, you can completely avoid the task by purchasing an autonomous floor cleaner, such as a Roomba.
A dry mop or dust mop can make dusting quicker and easier if you’d rather not get an automatic cleaner. Because microfiber has a static charge that draws dirt and debris, mops with microfiber cloths function particularly well in this regard.
weekly
Vacuuming: once a week and get anything your dusting efforts might have missed. The more power your vacuum has, the better it will be at getting rid of any last bits of dirt from your floorboards’ crevices.
Use a scratch-free vacuum attachment on wood floors.
Monthly
Deep Cleaning Wood Floors Every Month using a cleaner
Floors should be thoroughly cleaned once a month. Utilize a mop, Swiffer, and cleaner designed especially for your flooring and finishing.
Especially if you need to dilute your cleaner with water, carefully follow the instructions on the cleaner’s back.
Four Times a Year
Polishing : Your wood floors will last longer, look better, and be protected from being stripped if you polish them. Every three months, homeowners should polish hardwood floors, first sweeping the area to remove any debris.
Every Three to Five Years
Recoating: If your floors are beginning to look dingy, applying a fresh coat of finish can be all that’s needed to bring them back to life. Hardwood flooring should ideally be recoated every three to five years
Every Few Decades
Refinishing: Recoating and refinishing are frequently confused, but homeowners should be aware of the differences. Refinishing involves sanding the floors down and adding a fresh finish, whereas coating simply adds another coat of finish. Refinishing aims to totally return your wood floors to their pre-restoration state.
Depending on your lifestyle, some sources advise refinishing your floor every five to ten years, although the National Wood Flooring Association (NWFA) suggests doing it every few decades. As long as you also heed their instruction to recoat every three to five years, you are free to go with their less frequent recommendation.
What are the benefits of using a vacuum to clean your hardwood floors?
Vacuuming your hardwood floors weekly will clean them more effectively and help keep them dirt-free. Vacuuming also removes any excess hair, dust mites, or other allergens that can cause problems for people with certain health conditions.
Vacuuming also helps to dislodge any dirt or debris that may be stuck in the cracks and crevices of the floor.
Can I apply a sealant or wax directly into the wood without using any other products first?
Yes, you can apply a sealant or wax directly on the wood without any other products first. However, it is important to note that this may result in inferior results and should only be used as a last resort when all other methods have failed. When applying these types of coatings, be sure to use an applicator that has been specially designed for this purpose and avoid contact with water or moisture.
Before applying a sealant or wax, always make sure the surface is completely dry. This will keep damage to a minimum. Remember to test the product beforehand on a small section of your workpiece so that you know how it will behave once applied fully.
How do you deep clean hardwood floors from dog urine?
There are a few different ways that you can deep clean hardwood floors from dog urine.
One way is to use a product called “Urine Off.” This product is designed to clean up pet urine and other similar stains. Simply mix the contents of the bottle with water, spray it on the stain, and let it sit for several minutes. Then, scrub the area with a brush until the stain is gone.
But when should you disinfect your floor? Although the cleaners designed to deal with urine would nornally have some form of disinfectant built in, prior to disinfecting your hard surfaces, the CDC advises cleaning your floors. Because disinfectant sprays like bleach-based mixtures, 70% isopropyl alcohol, and others perform best when applied to a clean surface, this is the case.
Another way to deep clean dog-pooed wood floors is by using vinegar mixed with baking soda as your cleaning solution. Mix 1 cup of white vinegar with 1 cup of baking soda and pour the solution into a spray bottle. Spray the vinegar mixture on the wood flooring, let it sit for several minutes, then clean up the area with a mop and bucket.
Remember to always be careful when cleaning hardwood floors as they are very delicate and can easily be damaged if not treated properly.
Which one is better: cordless or corded?
Both cordless and corded tools have their benefits, but ultimately, it depends on your needs. Cordless tools are convenient as they do not require an outlet, making them ideal for when you’re working in tight spaces or if you need to move around the house quickly. They can also be more cost-effective due to their smaller battery size.
Corded tools offer greater versatility and are often better suited for larger projects or tasks that require longer-lasting power. Additionally, many models include a built-in saw blade, which makes cutting easier and faster than with a standard handheld saw.
Ultimately, what is most important is to understand your specific needs and choose the tool that will best suit them.
Which one is better: upright or canister?
When it comes to vacuums, there is no one-size-fits-all answer. It depends on the type of flooring you have, how much dust and debris you frequently remove, your budget, and other personal preferences. So, before making a purchase decision, it is important to do your research and determine which type of vacuum will best suit your needs.
People often choose upright vacuums for hard floors because they tend to pick up dirt and dust better. They also have shorter castors that make them easier to maneuver around tight spaces. Canister vacs work well on soft surfaces such as carpets because they can reach deeper into crevices. Also, canister models usually come with filters that help cut down on the amount of dust and allergens that get into the air when they are cleaned.
References:
https://www.woodfloors.org/maintenance.aspx