
Is your bathroom ceiling plagued by unsightly mildew? Don’t worry, with our easy steps, you can have a fresh and mildew-free bathroom in no time!
Key Takeaways:
- Identify the type of mold on the bathroom ceiling and determine the severity of the infestation. Allergenic molds can often be removed with home disinfecting products, while pathogenic and toxic molds may require professional removal.
- Create a homemade cleaning solution using dishwashing liquid, chlorine bleach, and water. Apply the solution to the moldy area, allowing it to sit before scrubbing with a soft-bristled brush or sponge.
- Ensure proper ventilation and wear protective gear, such as gloves, eyewear, and a face mask, when cleaning mildew from the bathroom ceiling.
- Rinse the area with plain water, checking for any remaining stains. If necessary, repeat the cleaning process.
- To prevent future mold growth, improve ventilation in the bathroom, clean the shower and tub stall regularly, and consider using anti-mold paint or ceiling cladding.
- Always prioritize safety and consult a professional if the mold infestation is large or toxic.
Identifying and Assessing the Mildew Infestation
Before diving into the cleaning process, it’s essential to properly identify the type of mildew and assess the extent of the infestation. This will help determine the most effective methods for removal and whether professional help is necessary. Here are some steps to take:
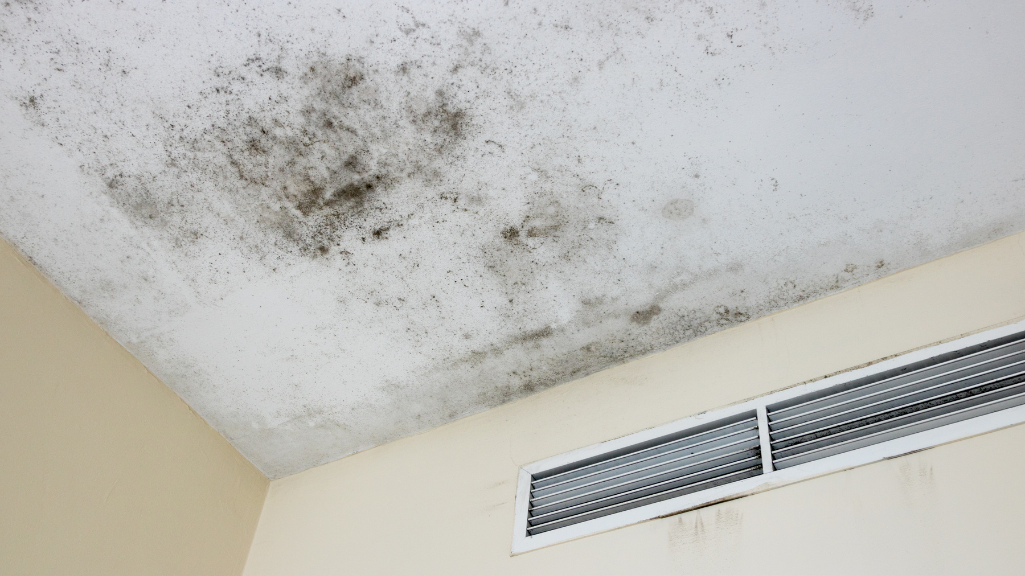
- Inspect the bathroom ceiling for any signs of mildew, such as black or brown spots, a musty odor, or discoloration.
- Take note of the size and location of the affected area. Is it confined to one small area, or has it spread across a larger surface?
- Use a mold testing kit to identify the type of mold present. This will help determine if the mildew is allergenic, pathogenic, or toxic.
- If the infestation is minimal and limited to a small area, it may be safe to remove it yourself using home cleaning methods. However, larger or toxic infestations should be handled by professionals to ensure your safety.
When to Seek Professional Help
If you are unsure about the severity of the mold infestation or if it covers a large area, it’s best to consult a professional mold remediation specialist. They have the expertise and equipment to safely remove the mildew and prevent it from spreading throughout your home. Professional help may also be necessary if you or anyone in your household suffers from respiratory issues or allergies that could be aggravated by mold exposure.
| Type of Mold | Description |
|---|---|
| Allergenic Mold | Causes allergies and can be easily removed with home disinfecting products. |
| Pathogenic Mold | Can cause infections and should be removed by professionals to avoid health risks. |
| Toxic Mold | Produces harmful mycotoxins and poses serious health risks. Professional removal is necessary. |
By properly identifying and assessing the mildew infestation, you can determine the appropriate course of action for effectively removing the mold and ensuring a clean and safe bathroom environment.
Homemade Cleaning Solution for Mildew Removal
Save money and effectively remove mildew from your bathroom ceiling with our homemade cleaning solution. This easy and affordable solution can help you tackle mildew and keep your bathroom clean and fresh.
“Mix a solution of dishwashing liquid, chlorine bleach, and water in a spray bottle or bucket.”
To create the cleaning solution, mix equal parts of dishwashing liquid, chlorine bleach, and water. You can use a spray bottle or a bucket to hold the solution. The dishwashing liquid helps break down grease and grime, while the chlorine bleach kills mold and mildew. This powerful combination will leave your bathroom ceiling looking spotless.
Before you begin cleaning, it’s important to put on protective gear. Wear gloves, eyewear, and a face mask to protect yourself from the cleaning solution and any potential mold spores. Additionally, ensure proper ventilation by opening windows or using a circulating fan.
- Spray or apply the cleaning solution to the moldy area and let it sit for a while. This will allow the solution to penetrate the mold and start breaking it down.
- Use a soft-bristled brush or sponge to scrub the area, paying special attention to the grout lines on tiled ceilings. Scrub in circular motions to effectively remove the mildew.
- Rinse the area with plain water and dry it with a soft cloth. Make sure to thoroughly dry the ceiling to prevent any residual moisture from promoting future mold growth.
By following these simple steps and using our homemade cleaning solution, you can easily remove mildew from your bathroom ceiling. Remember to always wear protective gear and consult a professional if the mold infestation is large or toxic. With regular maintenance and preventive measures, you can keep your bathroom clean, mold-free, and fresh.
| Advantages of Homemade Cleaning Solution: | Precautions: |
|---|---|
| Cost-effective | Wear protective gear (gloves, eyewear, face mask) |
| Easy to make | Ensure proper ventilation |
| Effective at removing mildew | Consult a professional for large or toxic mold infestations |
Scrubbing Away Mildew
Now that you have your cleaning solution ready, it’s time to roll up your sleeves and start scrubbing away that stubborn mildew. Follow these simple bathroom ceiling cleaning techniques to effectively remove the mold and restore a clean and fresh environment.
- First, ensure you are wearing protective gear such as gloves, eyewear, and a face mask to protect yourself from the cleaning solution and any spores that may be released.
- Open the windows or use a circulating fan to provide proper ventilation during the cleaning process.
- Using a spray bottle or bucket, apply the cleaning solution containing dishwashing liquid, chlorine bleach, and water to the moldy area. Allow it to sit for a few minutes to penetrate the surface.
- Next, take a soft-bristled brush or sponge and gently scrub the mold-infested area. Pay special attention to fully saturating the grout lines on tiled ceilings, as mold tends to grow in these porous areas.
- After scrubbing away the mildew, rinse the area thoroughly with plain water to remove any residue from the cleaning solution.
- Finally, dry the ceiling with a soft cloth to prevent moisture from lingering and creating an environment for mold to thrive.
By following these bathroom ceiling cleaning techniques, you can effectively remove mildew and prevent its reoccurrence. However, it’s important to note that if the mold infestation is large or toxic, it’s best to consult a professional for safe and thorough removal.
Remember, prevention is key in maintaining a mold-free bathroom. Improve ventilation by using the exhaust fan or opening windows. Additionally, regularly clean your shower and tub stall, and ensure they are dried properly after each use. Consider using anti-mold paint or ceiling cladding to provide an extra layer of protection against future mold growth.
Additional Tips for Mildew Removal:
- Always test the cleaning solution on a small, inconspicuous area of the bathroom ceiling before applying it to the entire surface.
- For hard-to-reach areas, consider using a long-handled brush or mop to scrub away mildew.
- Regularly inspect and address any signs of moisture or leaks in your bathroom to prevent mold growth from occurring in the first place.
| Product | Description |
|---|---|
| Mold and mildew cleaner | A commercial cleaner specifically formulated for removing mold and mildew. Follow the instructions provided on the product label. |
| Vinegar | A natural and non-toxic alternative to chemical cleaners. Mix equal parts vinegar and water to create a mildew-fighting solution. |
| Baking soda | A natural deodorizer and mild abrasive. Sprinkle baking soda on a damp cloth or sponge and gently scrub the affected areas. |
Preventing Future Mold Growth
Don’t let mildew make a comeback in your bathroom! Follow these simple tips to prevent future mold growth on your ceiling.
1. Improve ventilation: Proper air circulation is essential in preventing mold growth. Use an exhaust fan while taking showers or baths, and leave it running for at least 30 minutes afterward to remove excess moisture. Opening windows can also help improve airflow.
2. Wipe down surfaces: After each shower or bath, use a towel or squeegee to remove any excess moisture from the walls and ceiling. This will help prevent mold from forming in areas where water tends to accumulate.
3. Clean regularly: Regularly clean your shower and tub stall to remove any soap scum or residue that can provide a breeding ground for mold. Use a mildew-resistant cleaner and scrubbing brush to thoroughly clean the surfaces. Don’t forget to rinse and dry the area afterward.
4. Consider anti-mold products: Apply an anti-mold paint or consider installing ceiling cladding to create a barrier that prevents mold growth. These products are specially formulated to inhibit the growth of mold and mildew, providing long-term protection for your bathroom ceiling.
| Preventive Steps | Benefits |
|---|---|
| Improve ventilation | Reduces moisture and dampness, which are prime conditions for mold growth. |
| Wipe down surfaces | Prevents water accumulation and removes potential mold food sources. |
| Clean regularly | Eliminates soap scum and residue to minimize mold growth opportunities. |
| Consider anti-mold products | Creates a protective barrier that inhibits mold and mildew formation. |
By following these preventative measures, you can keep your bathroom ceiling mold-free and maintain a clean and healthy environment for you and your family.
Professional Help and Safety Precautions
While most mildew issues can be resolved with DIY methods, it’s essential to prioritize your safety and know when to call in the professionals. If you’re dealing with a large or toxic mold infestation, it’s best to seek expert assistance.
Professional mold remediation specialists have the training and equipment to handle extensive mold growth effectively. They can assess the severity of the infestation, identify the type of mold present, and develop a comprehensive removal plan to ensure the problem is eradicated.
When hiring a professional, make sure they are certified and experienced in mold remediation. They should follow industry guidelines and use proper containment procedures to prevent cross-contamination. Additionally, they will have access to industrial-strength cleaners and disinfectants that may be necessary for stubborn mold growth.
| Signs you may need professional help: |
|---|
| 1. Extensive mold growth: If the mold covers a large area (typically more than 10 square feet), it’s best to call in professionals to avoid the risk of spreading spores. |
| 2. Toxic molds: Certain mold species, such as black mold (Stachybotrys chartarum), can pose serious health risks. If you suspect toxic mold, professional remediation is essential. |
| 3. Health concerns: If you or anyone in your household has existing respiratory issues, allergies, or a compromised immune system, it’s safer to have professionals handle the mold removal to minimize health risks. |
| 4. Hidden mold: If you discover mold growth behind walls, in ceilings, or in other hidden areas, professionals can use specialized equipment to detect and remove the mold without causing further damage. |
Remember, safety should always be a priority when dealing with mold. Whether you choose to tackle the issue yourself or hire professionals, make sure to wear protective gear, such as gloves, eyewear, and a face mask, to minimize exposure to mold spores.
By taking the necessary precautions and knowing when to seek professional help, you can effectively eliminate bathroom mildew and create a safe and healthy environment in your home.
Conclusion
With these easy steps and practical tips, you can say goodbye to mildew and enjoy a clean and fresh bathroom ceiling once again.
First, it’s important to identify the type of mold on your bathroom ceiling. Allergenic molds can typically be removed with home disinfecting products, while pathogenic and toxic molds may require professional removal.
If you have a small and non-toxic mold infestation, you can usually tackle it yourself. Create a cleaning solution by mixing dishwashing liquid, chlorine bleach, and water. Put on protective gear, including gloves, eyewear, and a face mask, and ensure good ventilation.
Apply the cleaning solution to the moldy area, let it sit, and then use a soft-bristled brush or sponge to scrub the mold away. Be sure to fully saturate the grout lines on tiled ceilings. Rinse the area with plain water and dry it thoroughly. Repeat the process if needed.
To prevent future mold growth, improve ventilation in your bathroom by using the exhaust fan, opening windows, and wiping down the walls after showering. Regularly clean the shower and tub stall and dry them with a towel or squeegee. Consider using anti-mold paint or ceiling cladding as an additional preventive measure.
Always remember to wear protective gear and consult a professional if the mold infestation is large or toxic.
FAQ
What types of mold can be removed with home disinfecting products?
Allergenic molds can usually be removed with home disinfecting products.
When do pathogenic and toxic molds require professional removal?
Pathogenic and toxic molds may require professional removal.
How can I create a homemade cleaning solution for mildew removal?
Mix a solution of dishwashing liquid, chlorine bleach, and water in a spray bottle or bucket.
What protective gear should I wear when cleaning mildew from the bathroom ceiling?
Put on gloves, eyewear, and a face mask for protection.
How can I prevent future mold growth in the bathroom?
Improve ventilation, use the exhaust fan, open windows, wipe down walls after showering, and regularly clean the shower and tub stall.
What should I do if the mold infestation is large or toxic?
Consult a professional for removal and always wear protective gear when dealing with large or toxic mold infestations.